DIY - Friday: Striped bangles
Have you seen those nail + jewellery type tutorials around lately as well?
Let it dry. Finish it off with a coat of clear polish.
Finished!
I did and when I was looking through my sad bangle stash it hit me! They need some spice and what could be better (and easier) than applying some nail polish!
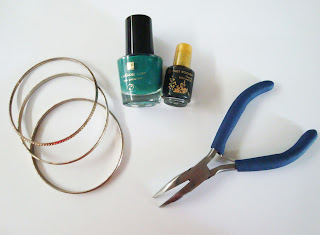
What you need:
x Nail polish in your favourite colours
x Clear top coat nail polish
x Bangles
x Pliers (or chopsticks if you're handy with them)
x Pliers (or chopsticks if you're handy with them)
x Paper tape (not necessary)
x A piece of paper or cardboard as protection for your table
What you do:
First decide if you want to make your stripes even or want it just a little more artistic ~.
If you want more even stripes you can use the paper tape to tape of the areas which you don't want to paint.
But I don't like it that polished (see what I did there!) so just dived in!
Open your polishes.
With your pliers, grab your bracelet.
Now start painting stripes on the bangle.
If you want more even stripes you can use the paper tape to tape of the areas which you don't want to paint.
But I don't like it that polished (see what I did there!) so just dived in!
Open your polishes.
With your pliers, grab your bracelet.
Now start painting stripes on the bangle.
Let it dry. Finish it off with a coat of clear polish.
Finished!
When looking at this picture I noticed I made a gryffindor bracelet! Ha!
And now wear it with pride! ^^


Comments
Post a Comment
Thanks for leaving me a comment! I love reading your reactions and I'll always try to answer them so check back ^^.
Thanks for brightening my day!